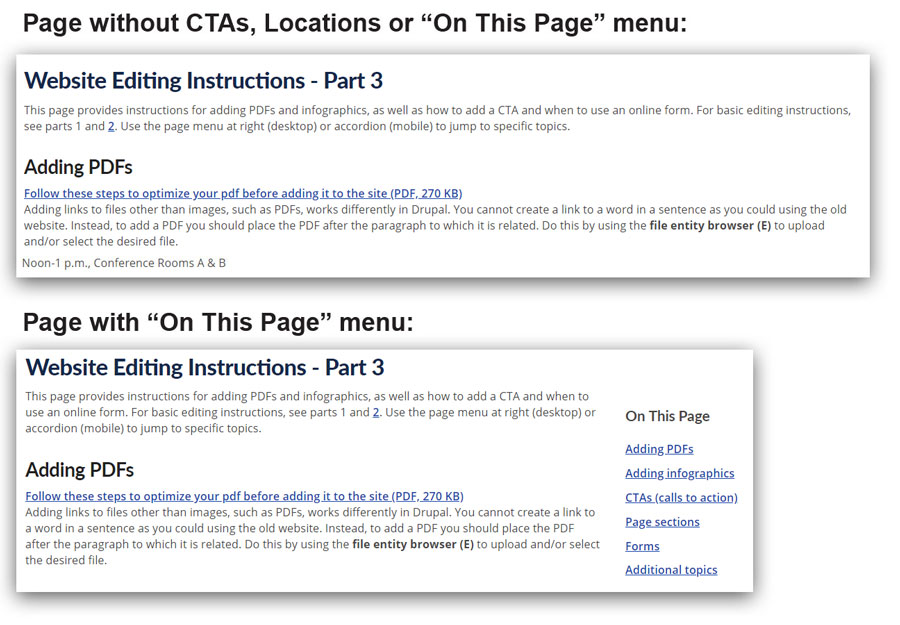
Introduction to Website Editing - Part 3
Adding PDFs
Adding links to files other than images, such as PDFs, works differently in Drupal. You cannot create a link to a word in a sentence as you could using the old website. Instead, to add a PDF you should place the PDF after the paragraph to which it is related. Do this by using the file entity browser (E) to upload and/or select the desired file.
In this example, the UK HealthCare Annual Report for 2016 will be embedded.
- Drag and drop or browse your files to locate the PDF, then click "Select entities."

- Give the file a description. This description will be the actual words contained in the link. Be sure to note the file type and size in parentheses.
- A caption is not needed.
- Do not select alignment unless you want the text or images following the embedded file to flow around it, which is not recommended. If you are uncertain, leave the alignment set to "none."
- Click "Embed."

The file will appear exactly as the description you provided.
NOTE: Before uploading a PDF, consider whether the content in the PDF could be used to create a web page or page section instead. Live content is always preferable to PDFs when possible.
Adding infographics
If an image is designed to convey written information rather than merely to enhance written information, you must create a text version of the infographic that fully conveys the meaning of the graphic. This can be added at the end of the page or on another page with a link near the infographic that says "View a text version of this infographic."
Page sections
Page sections provide a means of dividing lengthy pages into smaller chunks of text that are accessed using the "On This Page" menu on the upper right-hand side of the page. On mobile devices these sections collapse into an accordion that can be expanded by tapping on the plus sign. The accordion will appear below the main content of the page.
The addition of one or more page sections will prevent text on the page from spanning the entire width of the page, making it easier to read.
This page has six page sections:
- Adding PDFs
- Adding infographics
- Page sections
- CTAs (calls to action)
- Forms
- Additional topics
Adding a section
To add a page section, click the "Add Page Section" button to open the fields.
Headline and label
Text entered in the "Headline" field will appear in H2 style, so any additional headlines in the section should be H3 or smaller. Text entered in the "Label" field will appear as a link in the "On This Page" menu (or accordion). The text of these two fields may be different, but should convey similar information. If the headline is very lengthy, the label should be shortened to better fit the space. In the example below, the contact information on the medical records page has a longer headline with a shorter label.
Items
The drop-down in the "Items" field offers two choices: "Add content" and "Add listing." Select "Add content" for standard styled text. Select "Add listing" to add a dynamically generated list.
Examples of listings include:
- Physicians by location
- Physicians by service
- Services on location
See "Using Listings" for examples and specific instructions.
Deleting a section
If you have added a section and would like to remove it, simply click on the "Remove" button and then click "Confirm removal." You may also remove a content block or listing from a page section, while retaining the page section. Both content and listing options have individual "Remove" and "Confirm removal" buttons.
Reordering page sections
Page sections may be reordered easily. To move a page section up or down, click and hold on the crosshair symbol. Release the crosshair once you have placed the page section in the desired location. Note the warning message indicating unsaved changes on the page section. These changes will be saved when the page is saved or published.
CTAs (calls to action)
Most content types provide for calls to action. Like page sections, creating a CTA will prevent the main text on the page from spanning the full width of the page.
Rail CTA
The rail CTA features colored text on a colored background. It may also include an image.
- Background color (required; drop-down choice of dark blue, light blue, green or gold)
- Eyebrow (optional; should be all caps)
- Headline (required; should be all caps)
- URL (required; internal or external link)
- Link text (required; sentence case – not all caps)
- Image (optional; if used, alt text required)
Examples:
Note: The guillemet (double arrow) is added automatically.
Featured offerings/image CTA
The featured offerings CTA includes a photograph with a button link.
- Image (required)
- Headline (optional; all caps)
- URL (required)
- Link text (required; sentence case)
Examples:
Forms
Before uploading a PDF form, consider whether it is appropriate to build a web form instead. Many forms can be built in Drupal and submitted to the recipient by email. PHI will not be stored on our server. If your form does not need to be printed (to be faxed, for example) the web team can build a web form instead.
If you do need to upload a PDF form, please remember that all forms that collect PHI, or will be stored as part of a patient record, must be approved by the Forms Committee. Contact Julie Bentley for information.
